BAIT UP!
How to catch and keep quality bait
(Published in the November 2018 issue of Ski-Boat magazine)
By Jonathan Booysen
WHEN it comes to fishing, bait is one of the most important aspects to focus on. Most tackle shops have a good supply of various bait species, but these are not always the best quality. If you manage to find a shop that supplies fresh, quality bait, it is normally extremely expensive.
To overcome the problem of substandard bait quality and availability, I have made it a mission to load up with bait on every opportunity that I get. By doing this, not only do I know that I will have the type and quantity of bait that I need, but I also know what quality it is. The effort is definitely worth it when it comes to tournaments as I am already a few steps ahead of the competition before we even begin fishing.
In this article, I will be focussing on key items and fishing tactics for several of the species that are on the top of most anglers’ bait lists.
SOUNDERS
The echo sounder is one of your greatest assets when looking for bait such as mackerel, maasbanker, red-eyes, shad and pinkies. Colour sounders in particular depict bait shoals very well. The density of the shoal can also be determined by their colour on the screen; the denser the shoal, the lighter the colour on the screen. When you see a round ball with a red/yellow centre and blue outline a few metres off the structure, it is normally an indication of a dense shoal of baitfish.
In deeper water it is advisable to adjust the upper and lower limits of your sounder to focus on the area that holds the bait. Normally I set the lower limit to 5m more than the depth I am in and the upper limit to 15m above the depth I am in. For example, if I am in 50m, I set the limits to 35m and 55m. Set the sensitivity relatively high, around 90-95%, depending on your sounder. By doing this you will be able to see even the smallest showing of bait.
BRINE
If you are serious about bait quality then you need to handle it properly from the moment it comes out the water. This means having a cooler box or hatch filled with brine. Your basic brine consists of a slurry of crushed ice mixed with saltwater, a few caps of formalin and bicarb.
It is vitally important to use saltwater or heavily salted freshwater for your brine. The reason for this is that freshwater removes electrolytes from the baitfish’s flesh. As soon as a fish is removed from the sea, it begins to deteriorate. Exposing the baitfish to freshwater increases this rate of deterioration. By adding table salt (which has known preservative and antibacterial properties) to a freshwater brine solution, you will maintain the bait’s quality as there is less bacterial deterioration. By adding extra salt to an icy saltwater brine, you can form a brine that dramatically increases the length of time that bait can be stored and still maintain most of the properties of freshly caught bait.
SUGAR MACKEREL
(RASTRELLIGER KANAGURTA)
Mackerel is one of the most popular baitfish species on the KwaZulu-Natal coast. They are found in large numbers from the Cape all the way up to the KZN coast. The average size of these fish seems to be larger in the cooler waters of the Cape than those found in the warmer waters off KZN, even though larger mackerel are sometimes found in deep water 150m plus.
When trying to locate mackerel the best place to look is near large manmade structures around which shoals tend to congregate. Wrecks, sunken containers, pipelines, shark nets and marker buoys are some of the best places to investigate.
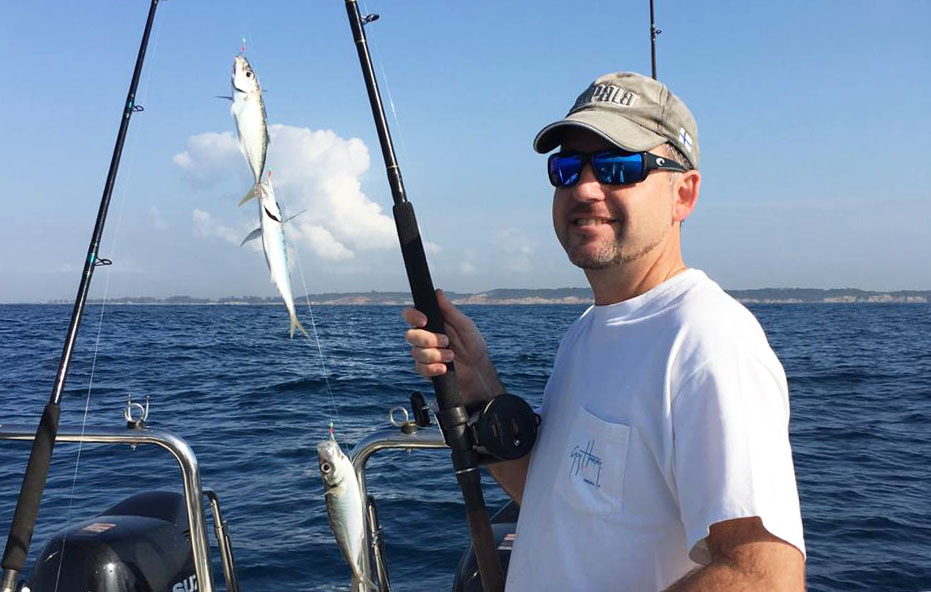
The best way to catch mackerel is with a sabiki rig, also known locally as a yozuri or baitjig. These rigs can be bought in most tackle shops and come in different colours and sizes, but I find the best colour for mackerel is white with red binding. I like to use the slightly bigger hook size with ten hooks rigs, and I do not like using pieces of bait on the hooks because then you tend to catch a lot of small bottomfish and other undesirables.
When you come across a shoal of bait drop the jigs to the depth indicated on the sounder. The mackerel usually hang higher in the water column than the other species of baitfish (like maasbanker) in a shoal. This can be seen on the sounder. Often when you catch a string of bait there will be maasbanker on the bottom hooks and mackerel on the top hooks. If you want to target the mackerel, try not to drop the jigs too deep through the shoal.
Often the line will go slack before it hits the bottom, indicating you have gone through the shoal and hooked several fish. The best thing to do is to retrieve the slack line as soon as humanly possible and then, once you come tight, slowly bring the fish to the surface.
If you do not go on immediately, work the jigs by raising and lowering the rod tip to impart some movement to the jigs. When you feel the fish climbing on, do not strike as this will only rip out the hooks. The resistance of the sinker and other fish pulling in the opposite direction is more than enough to set the hooks.
Once you have found the shoal, mark it on the GPS and make several drifts over the spot and fill up on bait.
Mackerel are strong, fast swimming fish that have caused more tangles in sabiki rigs than any other bait species put together. The reason for these tangles is that the hooked mackerel tend to all swim in the same direction, creating slack in the main line, resulting in a huge tangle which is known as “a bunch of grapes” — one big tangle of line in the middle with several fish hanging from it.
The easiest way to minimise these tangles is by changing the weight of the sinker you are using. Weights need to be at least 10 oz on a six-hook rig and slightly heavier on the ten-hook rigs. The reason for the heavy sinker is to keep the main line of the sabiki rig vertical while the mackerel are trying to swim up the line, preventing the otherwise inevitable tangle.
When unhooking the mackerel, try to use a small hook remover. To do this, hook the dropper line over the remover, slide the remover onto the curve of the hook and give it a shake. Usually the fish will pop off the hook. This system allows you to get the hook out without touching the bait and without removing the fish’s slime, resulting in much better quality baits.
These baits now need to go straight into the waiting brine solution.
RED-EYE SARDINES
Red-eye sardines are commonly found along the South African east coast in winter months. These small baitfish are a favourite among rock and surf anglers but are just as deadly when used offshore.
The red-eyes’ location is often given away by birds working the surface above the shoals. When you go to investigate bird activity you will often see small fish flickering just under the surface; these are most likely red-eye sardines. When you stop next to the shoals you will see a showing on the sounder right at the surface (in the top ten metres) and this is where you can target them effectively.
Red-eyes are relatively small fish — smaller than the Natal sardines — so you need small hooks to catch them. The best rig to use is the small ten-hook sabiki rig. When the fish are on the small side (10cm), the feathers on the sabikis can be too long and result in the fish missing the hooks. To prevent this, I shorten the feathers with a pair of scissors, reducing the size of the jig and increasing the chance of hooking more fish. The weight of the sinker you use depends on how you are fishing for them.
There are two main fishing methods I use for red-eyes and I alternate between the two depending on how the shoals are behaving. When the fish are boiling on the surface — normally given away by working birds — I rig two long spinning rods with sabikis and 2 oz sinkers. I then try to approach the shoal on the upwind side of them. The crew then cast the jigs over the shoal, with the wind, and slowly retrieve through the shoal. Try not to cast into the middle of the shoal as this will spook them. Also do your best to keep the jigs near the surface as this is where the shoal is most dense. If you let the jigs sink too far, you end up missing the shoal.
The second way I fish for red-eyes is when the fish have sounded. I use the echo sounder to look for the showing which will most often be in the top 10m of the surface. The boat is then stopped up-current of the showing, motors are switched off, and the boat is allowed to quietly drift over them.
In this situation I change tactics and try to get more rods in the water. I fish with one rod more than what I have crew on the boat. When a shoal is located, the sabiki rigs are sent down into them using a 6 oz sinker. When a string of red-eyes is hooked up, lift them slowly to the surface but don’t take them out the water, rather put the rod in a holder with the fish still on. Keep them about two or three metres under the surface; this keeps the shoal around the boat and the crew now fish for the red-eyes just under the boat. When the shoal moves off, repeat the process with the next shoal.
When switching between tactics the sinker size can be increased, but it does not need to be too big as they do not tangle the rig nearly as easily as stronger baits like mackerel.
When I have a string of red-eyes I find it easier to shake them off the rigs, straight into the brine instead of handling each fish. They lose their scales exceptionally easily and by shaking them off you retain most of the scales.
WALA-WALA
(CUTLASSFISH/RIBBONFISH)
Wala-wala are probably the top baitfish for crocodile ’cuda off the north coast of KZN. Every year anglers are prepared to sell their souls to get hold of wala-wala, just to have the chance at catching a trophy 30kg ’cuda.
Wala-wala are predatory fish that feed most actively at night. They are mainly found in harbours and estuaries, but it is not uncommon to catch them out at sea, especially when the water is green and cold.
These long, silver eel-like fish with a vicious set of teeth, can be bought in some specialised tackle shops and many anglers are more than willing to pay the high price to save themselves the effort of going out and catching them.
The best way to target wala-wala is by fishing at night off jetties or harbour walls near a light source. They will eat a variety of offerings from lures to fish fillets to small live baits but can show preference for a specific bait when they are being fussy. My personal preference when it comes to wala-wala is a fresh sardine fillet about 50-60mm long, but if they are really thick, a thin fillet of shad, razorbelly or wala-wala works very well.
Without a doubt, small drift baits catch more wala-wala than any other rigs. The trace I use consists of a 150mm section of light piano wire with a small swivel on one end and a #2 single hook on the other. From this hook I attach a small treble hook using another section of wire. The length of the hook rig is short enough to be concealed in a small fillet (see diagram below).
To rig the sardine fillet, pass the single hook through the tail section of the fillet and then put one hook of the treble through the lower part of the fillet. Use some ghost cotton to secure the bait to the front hook.
On the front section of wire, I attach a small light stick. This helps attract the wala’s attention and helps you keep track of the movement of your bait. Flick the bait out and let it freely drift down. When the light stick is out of sight, lift the rod tip, pulling the bait back into view, then lower the tip and let it sink again.
When a wala-wala takes the bait, it is in one of two ways. Most often it is just a slight weight on the line offering resistance when you lift the rod. When this happens, lower the rod tip and wait for the line to go taught, then give a quick sharp strike. The second kind of take is more savage and visual. As you watch the light stick sinking, it will suddenly streak away on the surface. This is followed by a wala-wala jumping out the water, clearing two- to three metres horizontally between jumps. The best thing to do here is to give a quick strike and hope it sticks. If you miss a wala on the first strike and you still have bait on, put the bait back in the area where you pulled the hook; it will often come back again.
When a wala-wala comes out of the water, it has a mirror finish which needs to be maintained. If you lie the wala on the ground and let it flap around, this shine will be lost so be sure to remove the hook and place it into brine without it touching anything.
When freezing wala-wala, be sure to wrap them individually and lie them straight.
HALFBEAKS (BALLYHOO)
When you talk sailfish, you can’t help but hear how good halfbeaks are as bait.
Throughout the world, halfbeaks (or ballyhoo) are one of the best bait for billfishing. The only problem with this bait is that it is difficult to get hold of; even bait shops struggle to get stock so anglers are forced to make other arrangements to get hold of them or catch their own.
Halfbeaks are common to the warmer waters of northern KwaZulu-Natal and into Moçambique. These small fish are found in most rocky bays from Cape Vidal northwards. They congregate along the reefs during low tide where they feed on food items on or near the surface. Halfbeaks can often be seen in shoals just under the surface while snorkelling in these bays. This is one of the best ways to locate a shoal of halfbeaks before going onto the reef to catch them.
Netting is not allowed in our marine parks, but in Moçambique this is one of the most common practices for catching the popular baitfish. Unfortunately netting leaves the bait in a less than perfect state when compared to those caught on baited hook.
When setting out to catch halfbeaks on the rocks with a rod and reel, it is best to go prepared. You should try to be totally self-sufficient and not have bulky cooler boxes or other items that could get washed away as the tide comes in. The easiest way to do this is by having a “shad bag” over your shoulder or around your waist in which you carry everything that you need.
When fishing for halfbeak, I use very small pieces of sardine or prawn. I find that it is easier to cut my bait before going onto the rocks and store it in a small bait container around my waist. The remains of the sardine are used for chumming. Other items that I take are spare hooks and a trace, a hook remover, an old rag and some ice.
The trace I use for halfbeaks is a basic freshwater kurper rig made using a champagne cork and a skewer/sosati stick.
To make the trace, pass your line and skewer through the centre of the cork. Secure the line to either end of the skewer with wax tape or dental floss. Make sure that you leave about 300mm of line to tie on the hook. Move the cork to the middle of the skewer so that it will drift horizontally in the water. Jam a toothpick in next to the skewer to stop the cork from sliding up and down. Tie a #10 hook to the end of the line and you are ready to go.
Once you have located a shoal of halfbeak, either by snorkelling or by seeing them with your polarised glasses, it is a good idea to crush a few of the sardine remains and throw them into the water near the shoal. Try to make the chum land with a noise/splash, as this will attract the fish which are very curious.
Once the fish are feeding on the chum, cast a small piece of sardine just past the shoal, then very slowly retrieve the bait and the fish should follow it. When this happens, stop retrieving and let the halfbeak eat the bait.
When one side of the skewer lifts out the water, give a quick strike and the hook should set. Bring the halfbeak in and swing it straight into the open bag of ice.
Try not to handle the fish too much while removing the hook because they also lose their scales very easily.
Fishing on the spring low tide gives you the longest period to fish for halfbeak. Always be aware of the sea conditions around you as rough waves and incoming tides can wash you off the rocks if you are not careful.
PACKING AND FREEZING BAIT
After going to all the effort of catching and caring for your bait, it is vital to follow through by packing and freezing them correctly. As I’m sure everyone knows, freezer burn is one of the worst things that can happen to bait that gets frozen and stored for extended periods. To prevent this, a proper vacuum packing machine is a must. This removes all the air from the packaging and eliminates all burn. If a vacuum machine is not available, wrapping each individual bait in plastic wrap will work.
When packing the vac-packed bait in the freezer, I try to freeze the bait straight. I also try to lie the baits on their backs until frozen. If they are frozen belly side down, the belly flesh tends to be weaker when thawed.
If you have a large amount of bait to freeze, try to spread them out as much as possible so that they freeze faster. If layers of bait are stacked on top of each other, the middle packs take longer to freeze and become squashed before they are solid. To prevent this, shuffle the bags around after a few hours or pack already frozen bags between the fresh packs.
Quality bait is difficult to get, but it makes the world of difference to your overall results. When you get into a shoal of your favourite bait, make the effort of catching and stocking up the freezer; it will save you money and frustration in the long run.